
Being the preemptive planner that I am, I knew someday we'd have a little bubba (at least I'd hoped), so over 2 years ago when a Craigslist ad appeared offering a decent shape $50 used glider rocker + ottoman, I jumped on it. These babies generally go for $150 at Target to well above the $350 range... and that's just for the basic ones, not like the super fancy upholstered ones from PB Kids that go for upwards of $1250. Although, if you're really determined, you can get that cushy tailored look by converting a basic wooden one (here's an example of that... talk about amazing!), but I was not that ambitious.
When Jay picked up that well-loved rocker 2 years ago and brought it home, I was a little bummed with how much extra TLC it was going to need. In fact, if I had been there for the pick up, I probably would have said thanks, but no thanks. Screws were missed or stripped, the finish was dull and dirty, and the cushions... oh my god, the cushions! Evergreen velour-like with worn no-traction velcro. Oh well, it was ours now and there it sat in the basement for 2 years.
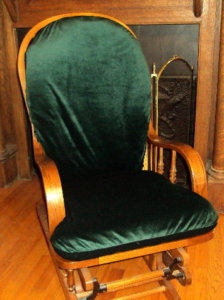 |
| Not the actual chair (I forgot to take a 'before' pic), but very similar, thank you Google Images and whomever's chair this is. |
Reupholstering new cushions was also a bit too grand of an idea. How about just making simple slipcovers that I can take off and throw in the wash? Brilliant. I started with the ottoman (bad idea). You'd think a simple rectangle would be the easy place to start, but it wasn't. I ended up just sewing the 'cover' right to the old cushion since I couldn't for the life of me come up with something that looked streamlined and clean. Oh well, chances are much more likely I'll need to wash the chair cover over the ottoman anyway. The chair covers were MUCH easier - I just laid the old cushions on top of the new fabric and left a couple extra inches for cushion height and a hem, cut, sewed around 3 sides, hemmed the 4th side with a few ribbons for cinching and voila! These still look streamlined even with the ribbons (to secure it to the chair frame) because the ties go in the back and then I tucked them in, so they're barely even noticeable.

In the end, I'd say a vast improvement! (For the first time in my decorating life, I wasn't afraid to mix patterns.... I think it turned out fun!) This really wasn't as hard as I thought it would be. Have you slipcovered something fugly and made it fabulous?
Chair fabric is "Gotcha True Turquoise" home decor weight fabric purchased from Warehouse Fabrics for a sweet deal of $7.47 per yard. This took about 2-2.5 yards of fabric or so, but I purchased more for extra projects.


I have a chair/ottoman about like this I need to cover too. After making a slip cover recently for my den ottoman (leather)---I think I will do something similar. I made that slipcover w/ elastic around the edges so that I could slip it off and wash as needed. The elastic holds it very securely in place---but it's a snap to remove! :) My chair/ottoman is a burg/mauve. Never matched a thing I own---but it was a gift when our first kid was born. I'm ready to update it! Thanks for the chair advice!
ReplyDeleteI love how you were able to give this old glider rocker new life.
ReplyDelete